Tax Advisors & Accounting Firms¶
DiKAS brings the POS and the accounting firm together: through the Firm Portal at konto.dikas.de/kanzlei, tax advisors manage all their DiKAS clients in one place — with a status overview, DATEV and DSFinV-K exports, cash register notification under § 146a AO, and a monthly overview for reconciling the POS with the books. All without switching context: the firm never has to log in to a client's POS.
ℹ️ Who is this page for? It is aimed at tax advisory firms. To learn how you, as a DiKAS business, grant your firm access (or decline a request), see DATEV Export → Tax advisor access via the customer portal.
What the firm can see — and what it can't: Access is mostly read-only and limited to linked clients. The firm retrieves status information, reports, and exports, submits the cash register notification, and maintains the master data required for it. Write access is limited to clearly defined, accounting-related actions: the reporting master data for the cash register notification, the DATEV settings — as a template for all clients (see the section "DATEV Template for All Clients") or individually per client (see "Setting Up a Client Yourself") — and the expense categories and product groups of individual clients. It cannot process sales, change articles or prices, or view any other businesses. Every link requires the client's explicit consent; all exports and write actions are logged.
Firm Access¶
Firm access is free — you register yourself, with no waiting period.
Registering¶
- Open konto.dikas.de/kanzlei/registrieren.
- Enter your firm name and email address (required fields); optionally a contact person, location, and website.
- Click „Registrieren" (Register) — you will receive a confirmation email.
- Use the link in the email to set your password (at least 8 characters) and you will land directly in the firm cockpit.
Didn't receive an email?
Check your spam folder or try again in a few minutes.
Logging In¶
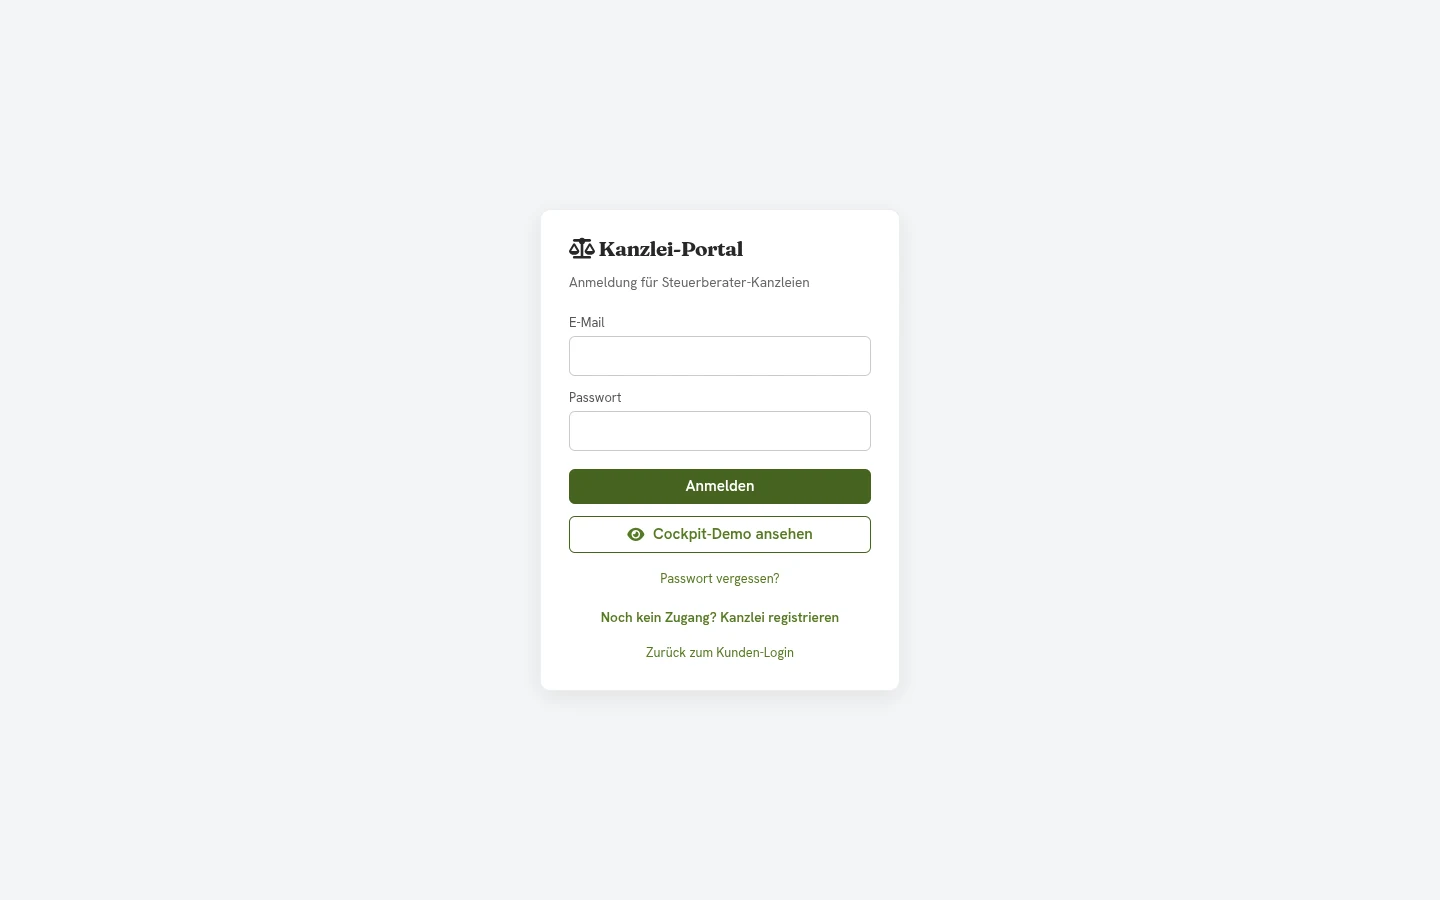
Log in at konto.dikas.de/kanzlei/login with your email and password — separate from the customer login of the customer portal.
Viewing the Cockpit Demo¶
Would you like to try out the cockpit first? On the login page, „Cockpit-Demo ansehen" (View cockpit demo) starts a demo with sample clients — no registration required. All views are visible; write actions and exports are disabled in the demo.
Linking Clients — Four Ways, Always With Consent¶
Principle: No data flows without the client's confirmation. There are four ways to create the link — all of them only result in an active link once the other side has agreed:
| Method | How it works | Who confirms? |
|---|---|---|
| 1. Request via online name | In the cockpit, under „Mandant verknüpfen" (Link client), enter the client's online name (e.g. mein-cafe) and click „Verknüpfung anfragen" (Request link) |
The client confirms in their customer portal |
| 2. Invitation by the client's email | Don't have the online name at hand? Enter the client's email address and click „Per E-Mail einladen" (Invite by email) — the client receives an email with a direct confirmation link | The client confirms via the link in the email |
| 3. Invitation by the client | The business invites its own firm (customer portal → Steuerberater (Tax advisor) → „Meinen Steuerberater einladen" (Invite my tax advisor)) — „Einladung vom Mandanten" (Invitation from client) then appears in the cockpit | The firm accepts with a single click — the link is active immediately, since the client's consent is already in place |
| 4. Via DiKAS support | In special cases, DiKAS support sets up the link | Support — after checking with the client |
Until confirmed, the client list shows the status „Wartet auf Bestätigung" (Awaiting confirmation) — the client's data is not visible during this time.
💡 Firm not yet on DiKAS? Method 3 still works: the invitation email contains a registration link (valid for 7 days). After registering, the client's invitation appears automatically in the cockpit.
ℹ️ No customer disclosure: For the email invitation (method 2), DiKAS always responds neutrally ("If an account exists, its owner has been notified") — whether an email address belongs to a DiKAS account is never disclosed. No email is sent to addresses without a DiKAS account.
Removing the link: The link can be removed by either side at any time. The firm removes it directly in the client's row via the unlink icon; the client revokes access in their customer portal via „Zugriff entziehen" (Revoke access) (there they decline open requests and withdraw their own invitations).
The Client Overview¶
The heart of the cockpit is the „Meine Mandanten" (My clients) list — one row per business with status indicators and all actions:
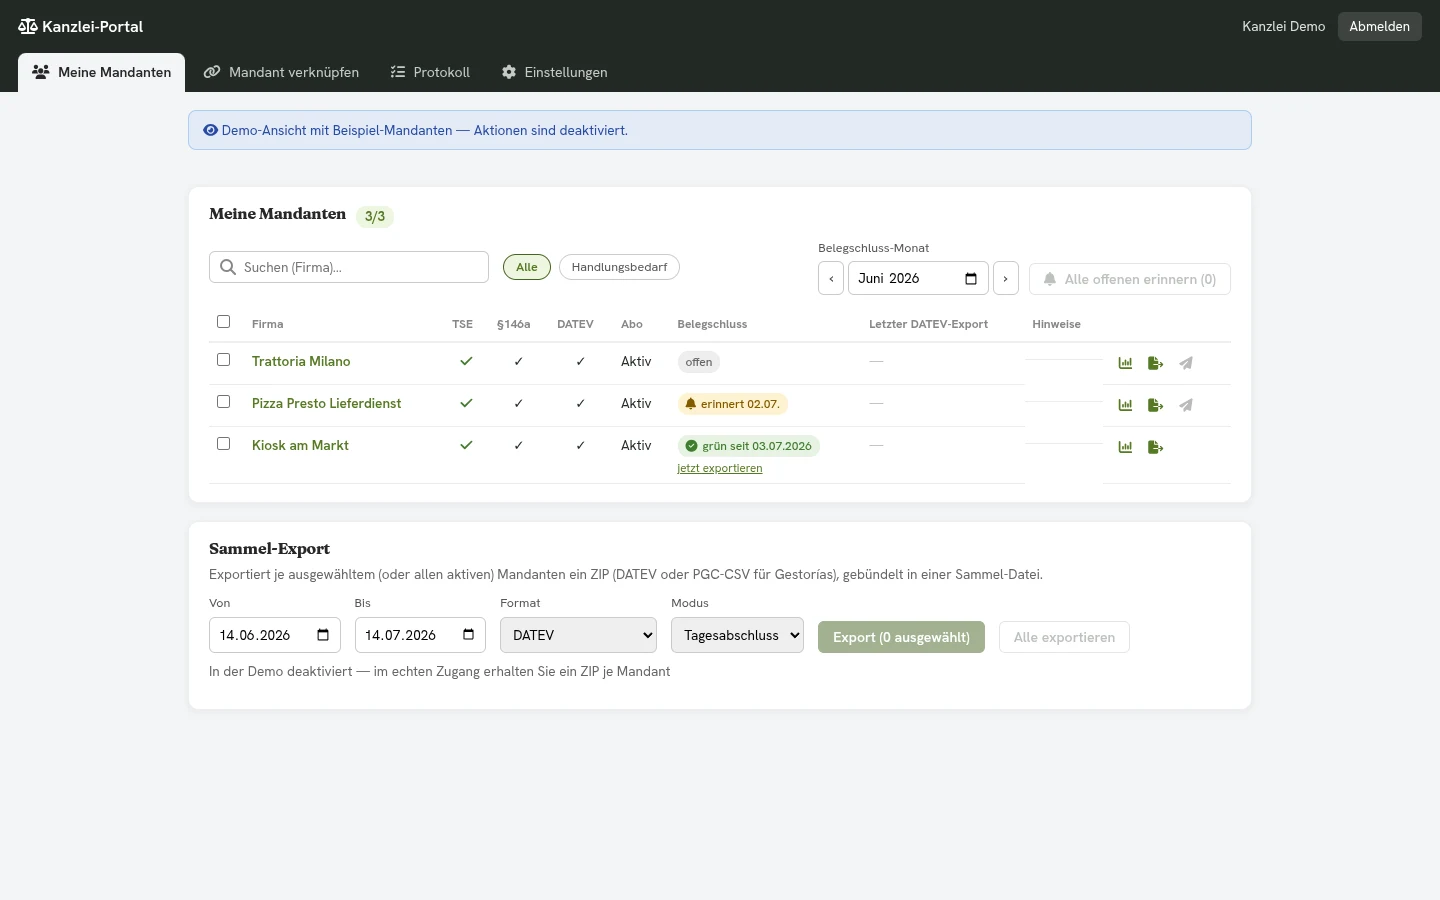
| Column | Meaning |
|---|---|
| Online name / Company | The client's identifier and company name |
| Status | Active / Awaiting confirmation / Invitation from client |
| TSE | ✓ = TSE active, ✗ = no active TSE |
| §146a | ✓ = cash register notification to the tax office completed |
| DATEV | ✓ = DATEV configuration maintained in the client |
| Subscription | Status of the DiKAS subscription |
| Last DATEV export | Date of the last export via the cockpit (sortable) |
| Notes | Brief notes when action is needed |
Search, sort, filter:
- Search field — filters live by online name and company.
- Sorting — click the column headers Online name, Status, or Last DATEV export (a second click reverses the direction).
- Filter chips — All · Action needed (TSE missing, notification missing, or DATEV not configured) · Awaiting confirmation. The chips show the respective count.
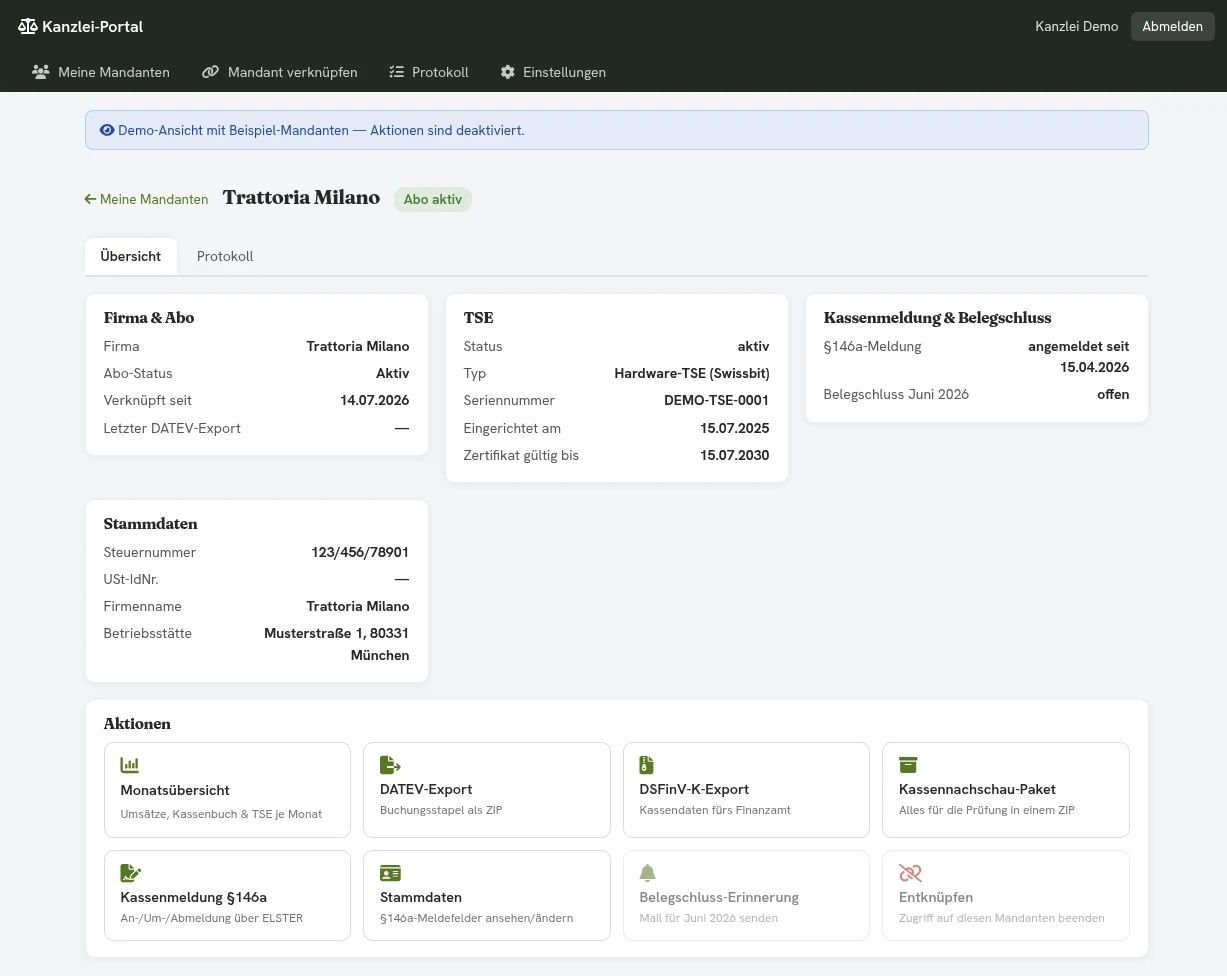
Actions per client (icons at the end of the row): monthly overview · cash register notification § 146a · master data · TSE info · DATEV export · DSFinV-K export · Kassennachschau package · unlink.
💡 TSE info: The dialog shows the TSE type (Cloud TSE or Swissbit hardware), serial number, setup date, and the expiry of the TSE certificate — including a warning if the certificate is about to expire. The live counter and self-test status continue to be shown by the POS itself (Settings → TSE).
Exports Without Switching Context¶
All exports run directly from the cockpit — no need to log in to the client's POS. Every export is logged and updates the „Letzter DATEV-Export" (Last DATEV export) column.
Individual DATEV Export¶
The „DATEV-Export" action in the client's row → choose a period and mode (end-of-day report, per receipt, invoices, or expenses) → download as DATEV_<OnlineName>_<Von>_<Bis>.zip. The account configuration (chart of accounts, revenue accounts, etc.) comes from the client's DATEV settings — so you export exactly the same posting batches as the business itself.
Bulk DATEV Export¶
Select multiple clients via checkbox (or „Alle exportieren" — Export all), set the period and mode → one combined ZIP with one export file per client (DATEV_Sammel_<Von>_<Bis>.zip). Ideal for the monthly run across your entire client base.
🔐 ZIP password: If the client has set a ZIP password in their POS under Admin → DATEV → Tab „Steuerberater" (Tax advisor), their export file is AES-256 encrypted. You get the password directly from the client (once, e.g. by phone).
DSFinV-K per Client¶
The „DSFinV-K-Export" action → choose from/to dates → DSFinVK_<OnlineName>_<Von>_<Bis>.zip. This is the same export as in the POS under Settings → TSE — in the format of the Digital Interface of the Tax Authorities for Cash Register Systems (DSFinV-K). For large periods, the export can take a few minutes.
Kassennachschau Package¶
For an unannounced cash register inspection (Kassennachschau, § 146b AO), the „Kassennachschau-Paket" action assembles everything relevant to the audit into one ZIP (Kassennachschau_<OnlineName>_<Von>_<Bis>.zip):
- the DSFinV-K export for the selected period,
- the TSE export (TAR data from the technical security device),
- the cash register notification log (PDF) — all § 146a notifications with ELSTER tickets.
⚠️ TSE export only when the TSE is reachable: If the client's TSE is not reachable from the cloud (e.g. a hardware TSE on a local installation), the package contains a notice file instead of the TSE export — the business then creates the TSE export directly at the POS.
💡 For Spanish clients, the alternative format PGC-CSV (Gestoría) is available for the DATEV export.
DATEV Template for All Clients¶
Instead of maintaining the DATEV accounts for each client individually, you store your preferred settings once as a firm template and apply them to all linked clients at the push of a button. You find the card in the cockpit under Einstellungen → DATEV-Vorlage (Settings → DATEV template).
- Choose the chart of accounts — „SKR03 übernehmen" or „SKR04 übernehmen" (apply SKR03/SKR04) fills all accounts with the matching default values; you then adjust individual accounts.
- Set the fields — revenue, cash, special-item and expense accounts, export mode, tip switch, reverse charge, and the firm's contact details (tax advisor e-mail and name).
- Save the template.
- „Auf alle Mandanten anwenden" (apply to all clients) — after a confirmation prompt, DiKAS writes the template into the DATEV settings of every actively linked client and then shows how many clients it was applied to.
🔒 What is kept per client: the client number, advisor number and any ZIP password are never overwritten — the client number identifies the individual client in the DATEV import, and the ZIP password is the business's secret. Only the accounting settings (chart of accounts, accounts, export mode, options) and the tax advisor e-mail and name are transferred.
ℹ️ Every application is logged. Clients whose link was revoked during the process are skipped; DiKAS reports unreachable clients separately and still updates the others. As long as no template has been saved, „Auf alle Mandanten anwenden" stays disabled — so an accidental click never overwrites clients that were set up individually.
Cash Register Notification (§ 146a) by the Firm¶
The firm can submit the cash register notification to the tax office (notification under § 146a para. 4 AO) on behalf of its clients — using the firm's own ELSTER organization certificate. The firm acts as the data transmitter; the client remains the taxpayer.
Storing the Firm Certificate¶
In the cockpit section „Kanzlei-Zertifikat (ELSTER)" (Firm certificate (ELSTER)), you upload your organization certificate as a PFX file (the PIN is only used for verification):
- The certificate is stored encrypted and never disclosed — only the file name and validity are visible.
- The expiry date is displayed; if the certificate is about to expire, the cockpit shows a warning.
- The PIN is never stored — you enter it again for every submission.
- To replace it: simply upload a new file. It can be removed at any time.

Maintaining the Client's Master Data¶
Every notification requires complete reporting master data (in particular the tax number). If something is missing, the notification dialog shows it — and you add it directly in the cockpit via the „Stammdaten" (Master data) action:
- tax number, VAT ID, tax office number, federal state,
- natural person (with tax ID, name, date of birth) or company (company name, legal form),
- address of the company and the business location.
Changes take effect on the next cash register notification and are logged (who changed which field, and when).
Submitting the Notification¶
- Open the „Kassenmeldung" (Cash register notification) action in the client's row. The dialog shows the current status (registered since / deregistered on / not yet reported) and the latest notifications with the ELSTER ticket — submissions made by the firm are marked „durch Kanzlei" (by the firm).
- Choose an action: Anmelden (Register), Ummelden (Re-register — TSE change, with the date and reason for decommissioning), or Abmelden (Deregister).
- Enter the certificate PIN and click „An ELSTER übermitteln" (Submit to ELSTER).
- The transfer ticket is stored in the client's log.
ℹ️ Legal framework: Submission by an authorized representative is provided for in the ELSTER procedure — the firm uses the same organization certificate as for tax returns. In the data record, the firm appears as the transmitter; the notification itself still concerns the client's business. How the business handles the notification itself is described under Cash register notification to the tax office.
Monthly Overview¶
The monthly overview (an action in the client's row) is the „Buchhaltung ↔ Kasse" (Bookkeeping ↔ POS) reconciliation screen: all POS figures for a period at a glance — e.g. for the advance VAT return or the monthly close.
Choosing a period: month dropdown (default: previous month) or a free from/to date range. Export: as PDF (for filing in the firm's workflow) or CSV (for further processing).
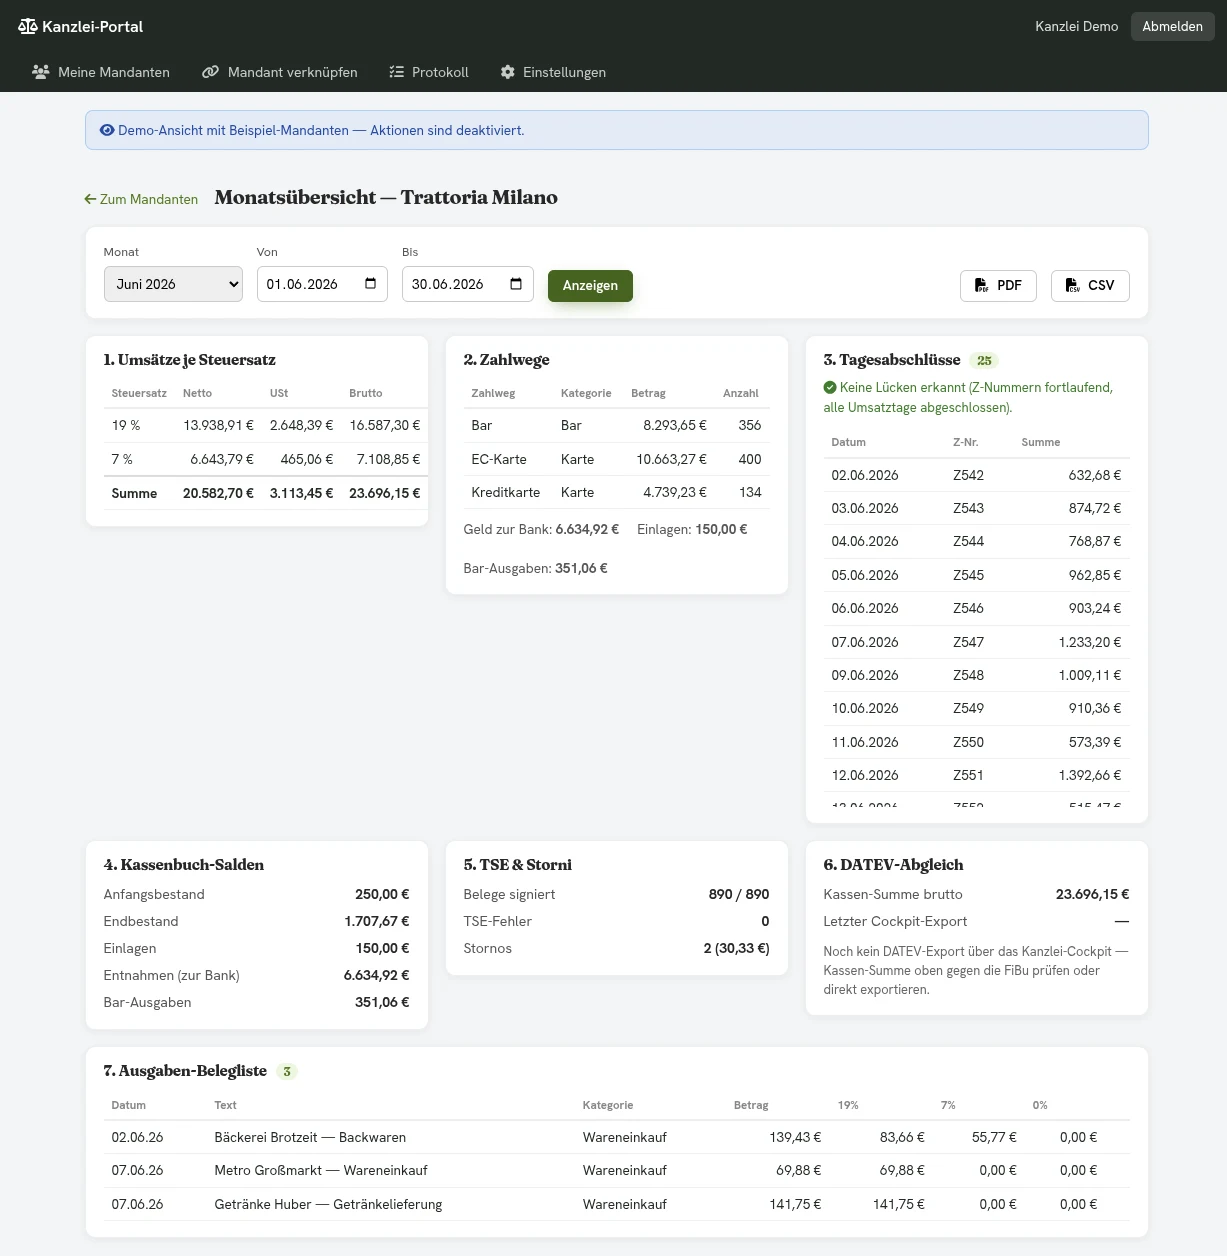
The screen shows seven blocks:
| Block | Content | What for? |
|---|---|---|
| 1. Revenue by tax rate | Net, VAT, and gross per tax rate (0/7/19 %) plus total | Reconciliation with the advance VAT return |
| 2. Payment methods | Cash, card, voucher, customer credit … with amount and count; plus „Geld zur Bank" (cash to bank), deposits, and cash expenses | The payment method totals reconcile against block 1 |
| 3. End-of-day reports | List of all Z-reports (date, Z number, total) with a gap check: missing revenue days and jumps in the Z numbers are flagged | Completeness of the records |
| 4. Cash book balances | Opening and closing balance for the period, deposits, withdrawals, cash expenses | Checking cash-count reconcilability |
| 5. TSE & voids | Share of TSE-signed receipts (signed/total), TSE errors, and the number and total of voids | Spotting fiscal anomalies early |
| 6. DATEV reconciliation | The POS's gross total for the period and the date of the last cockpit export | Has everything arrived in the books? |
| 7. Expense document list | All expenses (date, text, category, amount, VAT split) — the receipt photo by clicking the image icon | Checking incoming receipts without requesting paper |
💡 Tip: If block 3 reports gaps or block 5 shows unsigned receipts, a quick call to the client is worthwhile — usually a forgotten end-of-day report or a TSE fault is behind it.
Two-Factor Authentication (Recommended)¶
Your firm access can be secured with a second factor (TOTP — Google Authenticator, Aegis, 1Password, and others). We strongly recommend this: the cockpit provides access to POS data for multiple clients.
- Settings → Security → Enable two-factor: scan the QR code with your authenticator app (or enter the displayed key manually) and confirm the 6-digit code.
- 10 recovery codes are then shown once — store them securely! Each code works exactly once, in case your phone is unavailable.
- From now on, logging in requires a password and a code. After five incorrect codes, login is locked for 15 minutes.
- Disabling it requires a password and a valid code. A password reset does not turn off two-factor protection.

Document Cutoff: Monthly Sign-Off by the Client¶
For the monthly close, you can have each client confirm that all receipts and transactions for the month have been recorded in the POS — a small completeness declaration that is logged.
- At the top of the client list, select the month (default: previous month). Each row shows the status: gray = open, yellow = reminded (with date), green = confirmed ("green since …").
- Erinnern (Remind) sends a short email to the client — individually per row or in bulk via „Alle offenen erinnern" (Remind all open). At most once every 3 days per client (the button shows the lock-out period).
- The client opens the link from the email (valid for 14 days, no login required), sees a brief monthly summary (number of receipts, expenses with receipt-photo rate), and confirms with a single click.
- The row turns green — next to it, „jetzt exportieren" (Export now) leads directly to the DATEV export for the month.
Each new reminder invalidates the previous link; once the link between firm and client is removed, open links no longer work.
Setting Up a Client Yourself¶
On the client detail page there are two further tabs that let you set up a client's accounting completely without having to ask the business.
DATEV — the complete DATEV configuration of this client: client and advisor number, chart of accounts, all revenue and cash accounts, special items, tips, reverse charge, export mode and options. At the very bottom is the payment method account mapping („Zahlungsart-Kontenzuordnung"): a separate account and contra account per payment method (cash, debit/credit card, net cash, net card, customer credit, house tab). Without an entry, the export posts the payment method to the default accounts — so only create what should differ from them. Account and contra account must be greater than 0; 0 is not a valid DATEV account number and would produce a defective posting record. You can assign a new ZIP password; for security reasons it is never displayed, not even to you — the screen only shows whether one is set. This screen deliberately offers no way to remove it. If you assign a new password, tell the client — otherwise they can no longer open their own exports.
Categories — two blocks:
- Expense categories (expense side): name, DATEV account and tax rate.
- Product groups (revenue side): account and contra account per group. Newly created groups are invisible in the POS — they count for account assignment and the monthly report but do not create a new button for staff. The business can make them visible itself.
👁️ The client sees your changes. What you save here is not only logged but also shown to the business: in its DATEV screen as a notice banner, in the expense categories in the column „Zuletzt geändert von" (last changed by) and in the product groups as a line in the detail area — each with your firm name. This is intentional: the client should never have to wonder why an account assignment has changed.
Template and Individual Maintenance¶
As soon as you save the DATEV configuration or a product group account assignment of a client individually, that client counts as individually maintained. From then on, „Auf alle Mandanten anwenden" (section above) leaves it untouched — your detailed work can no longer be overwritten by accident. If you do want to apply a changed template to it, lift the individual maintenance again in the „DATEV" tab.
Changes to expense categories do not trigger this lock — they are not part of the DATEV configuration.
What the Client Sees¶
Every change is recorded in your access log. In its own DATEV screen, the client additionally sees a banner „Zuletzt geändert von your firm am …" (last changed by … on …). If the client then saves the DATEV configuration itself, the banner disappears again.
Firm Profile & Directory¶
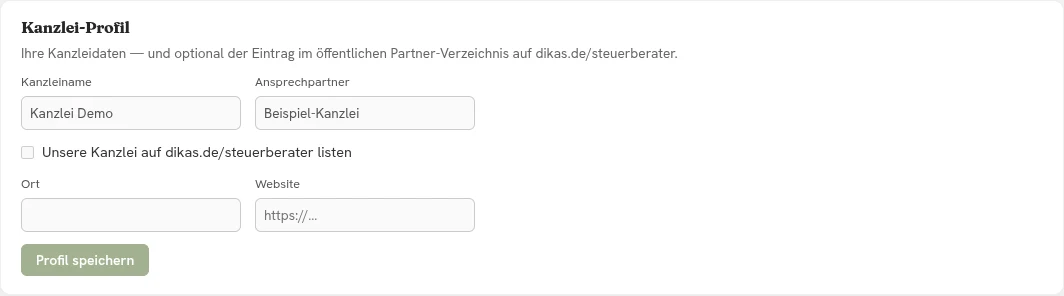
In the cockpit section „Kanzlei-Profil" (Firm profile), you maintain your firm's location and website. With the opt-in „Unsere Kanzlei auf dikas.de/steuerberater listen" (List our firm on dikas.de/steuerberater), your firm appears in the public tax advisor directory — DiKAS businesses looking for a firm will find you there. Without the checkbox, you will not be listed; the opt-in can be withdrawn at any time.
Frequently Asked Questions¶
What does firm access cost? Nothing — the firm portal is free for tax advisors.
Can the firm change anything in the client's POS? Access is mostly read-only (status, reports, exports). The only write actions are accounting-related exceptions: the reporting master data for the cash register notification, the DATEV settings — as a template for all clients or individually per client — and the expense categories and product groups of individual clients. With the template, each client's client number, advisor number and any ZIP password are kept. All of these changes are logged. The firm cannot process sales, change articles/prices or view other businesses.
Can the firm see all DiKAS businesses? No, only its own actively linked clients. Every link requires the client's consent.
The client didn't receive the request — what now? The client finds open requests in their customer portal under Steuerberater (Tax advisor). Alternatively, invite them by email (direct link for confirmation) — or they can invite you themselves.
Does every cash register notification need the certificate PIN? Yes. The PIN is never stored and is entered anew for every submission.
Further Reading¶
→ DATEV Export — export modes, chart of accounts, and tax advisor access from the client's perspective → Cash register notification to the tax office — the notification procedure from the business's perspective → TSE for Tax Auditors — technical details on the TSE export and audits