The Setup Wizard¶
The Setup Wizard walks you step by step through everything that makes your POS "tax-office-ready": tax data, the cash register notification to the tax office, and your menu. It's the same path for everyone — whether you're starting a new business or switching to DiKAS from another POS system. The wizard asks questions and shows only the steps that apply to you.
Starting the Wizard¶
- On first login, the wizard starts automatically.
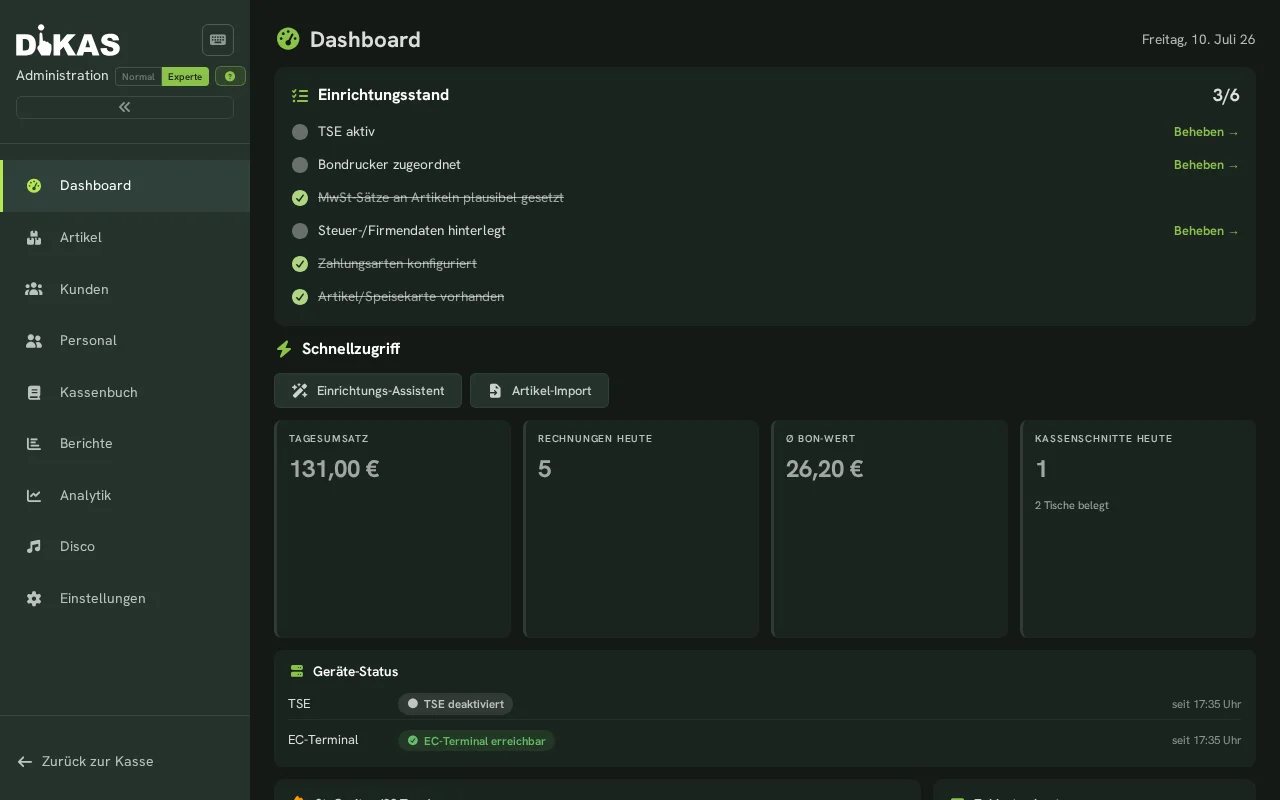
- After that, you can reach it any time from the Admin dashboard — look for the "Einrichtungs-Assistent" (Setup Wizard) card there. There's no separate menu entry in the sidebar.
- Click "Später" (Later) to leave the wizard at any time. Your progress is saved — just continue from the dashboard right where you left off.
Everything Is Also Possible Without the Wizard
The wizard is a convenient guided path, not a requirement. You can skip any step and complete it individually later — tax data and the tax office notification under Settings → Finance, the menu import under Articles → Import.
The Steps at a Glance¶
| Step | What happens | For whom |
|---|---|---|
| 1. Welcome | Checklist: what's still missing for a ready-to-use POS? | Everyone |
| 2. Tax data | Enter tax number, tax office, state | Everyone |
| 3. Tax office notification | Register the POS electronically via ELSTER | Everyone |
| 4. Data source | Fresh start or switching from a legacy system? | Everyone |
| 5. Export guide | Instructions: export data from the legacy system | Switchers only |
| 6. Menu | Import or create articles | Everyone |
| 7. Switch checklist | Legal obligations when changing POS systems | Switchers only |
| 8. Done | Your POS is ready to go | Everyone |
Step 1: Welcome and Checklist¶
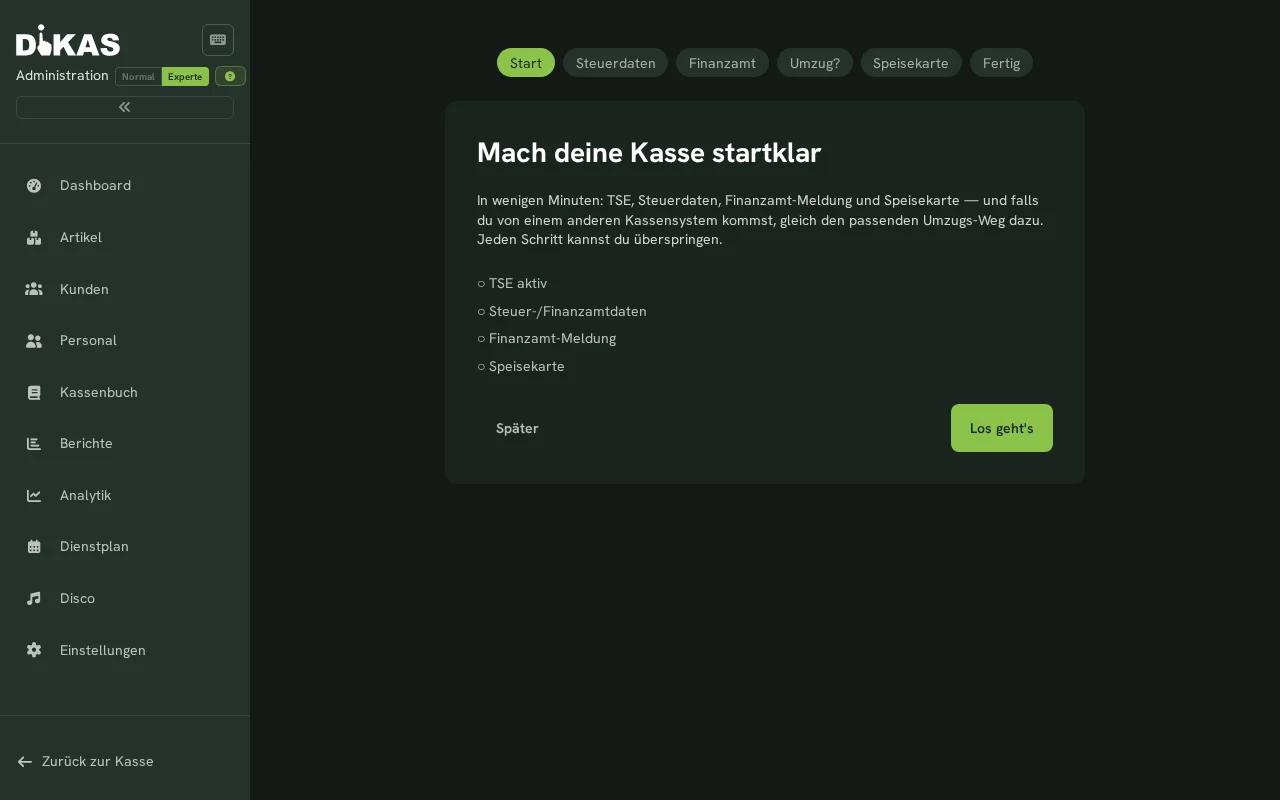
The wizard greets you with "Mach deine Kasse startklar" ("Get your POS ready to go") and shows a checklist of the current status:
- TSE active
- Tax data
- Tax office notification
- Menu
Completed items are checked off — you see at a glance what's still missing.
Step 2: Tax Data¶
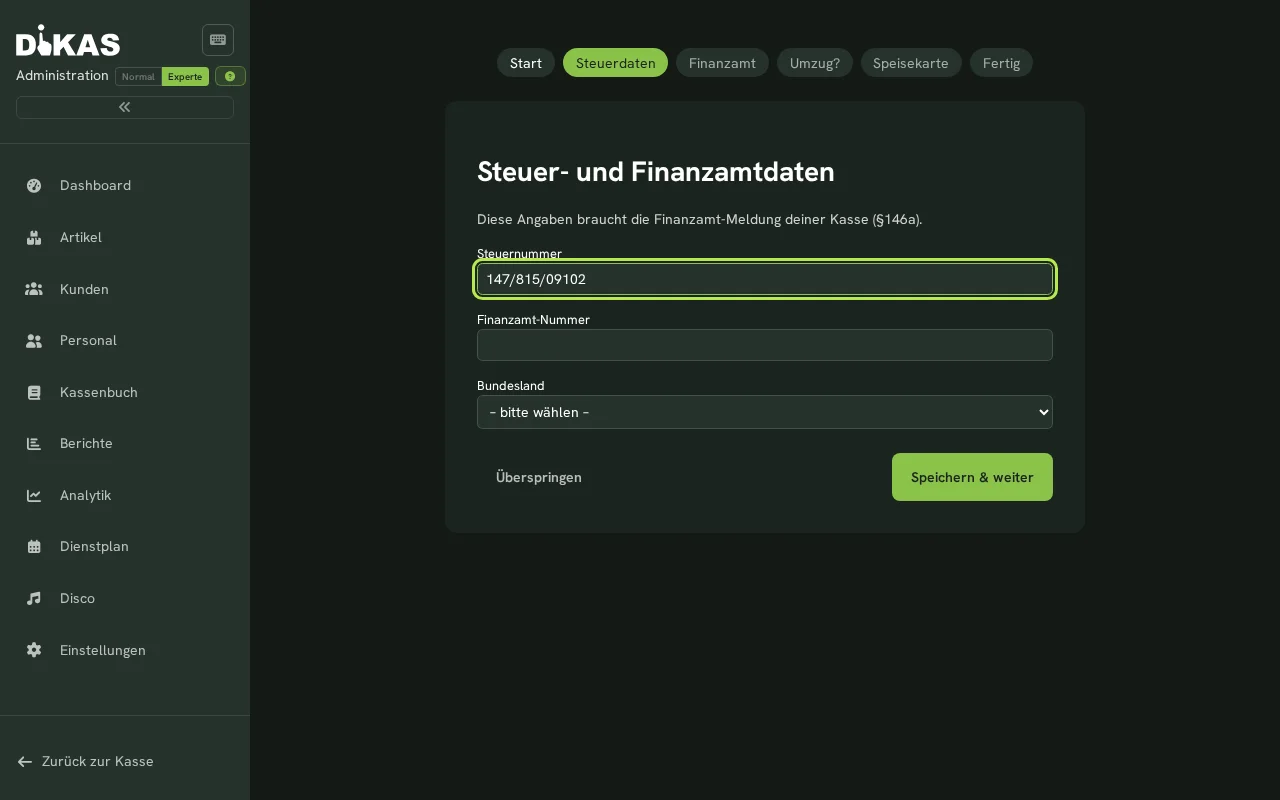
Here you enter the data the tax office needs for your POS:
| Field | Description |
|---|---|
| Tax number | Your business tax number |
| Tax office number | The number of your responsible tax office |
| State | Select from the list |
This information forms the basis for the Kassenmeldung (cash register notification) under § 146a AO — the legally required registration of your POS with the tax office.
Step 3: Register the POS with the Tax Office (ELSTER)¶
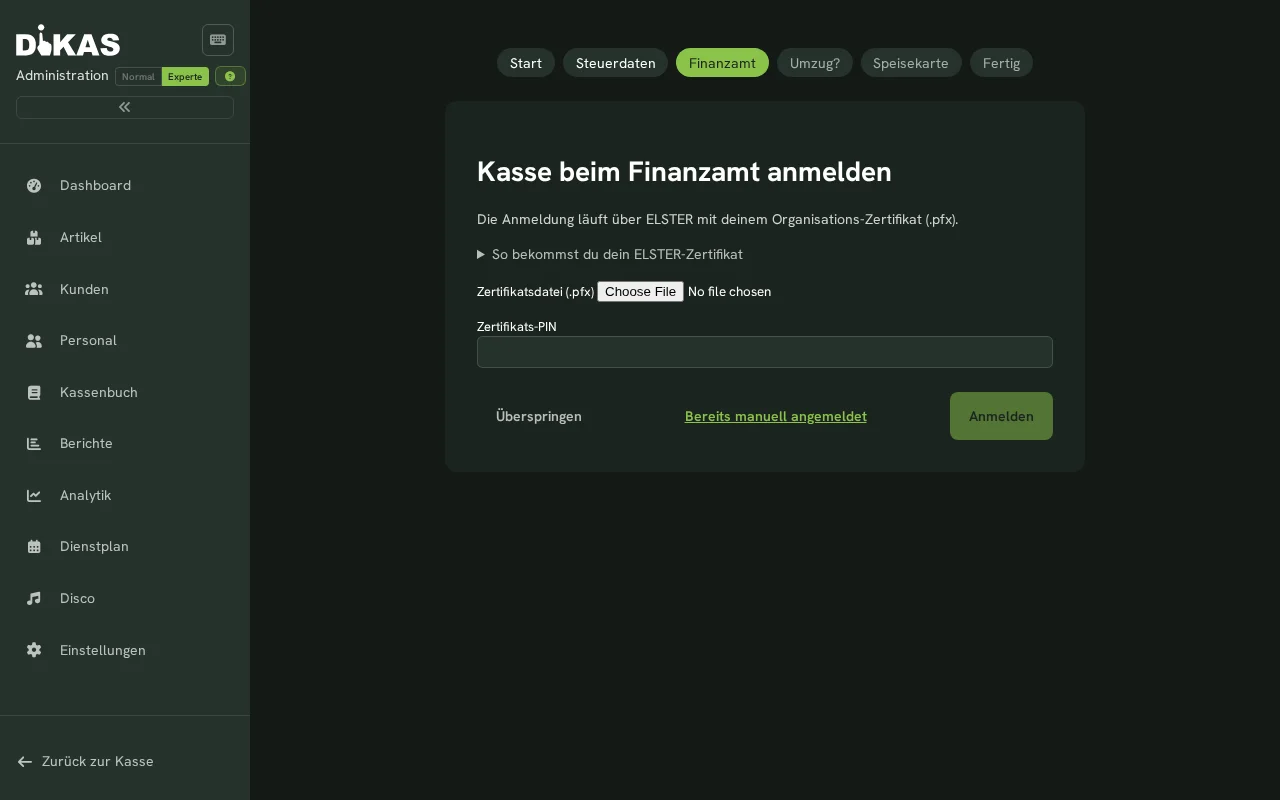
DiKAS registers your POS electronically via ELSTER — you don't need to fill out a form:
- Upload your ELSTER certificate file (file extension
.pfxor.p12) - Enter the associated PIN
- DiKAS submits the cash register notification to the tax office electronically
Don't have a certificate handy? Choose "Überspringen" (Skip) and complete the notification later. If you've already registered the POS yourself via the ELSTER portal, choose "Bereits manuell angemeldet" (Already registered manually).
For more details on the notification, see Kassenmeldung — Cash Register Notification to the Tax Authority.
Step 4: Where Does Your Data Come From?¶
The wizard asks "Woher kommen deine Daten?" ("Where does your data come from?") — this is where new businesses and switchers diverge:
| Choice | What happens |
|---|---|
| Fresh start, no legacy system | Continue straight to the menu — no switch-related steps |
| ready2order | Direct import of your data |
| orderbird | Import via the DSFinV-K export |
| Vectron | Import via the DSFinV-K export |
| Other system | Import via the DSFinV-K export |
| Excel/CSV | Import from your own spreadsheets |
Step 5: Export Guide (Switchers Only)¶
If you selected a legacy system, the wizard shows a tailored guide: where to find the export in the old system, which format you need, and what to watch out for. This way you can pull your data out without having to search through the old system's manual.
Step 6: Create Your Menu¶
The article import is embedded directly in the wizard. Two ways:
- AI import: Photograph your menu or upload it as a PDF/CSV — DiKAS reads out the articles and creates them.
- Import from the legacy system: Load the data you exported in Step 5.
For details on managing articles (prices, tax rates, categories), see Creating Articles.
Step 7: Legal Switch Checklist (Switchers Only)¶
Switching POS systems comes with legal obligations. The wizard walks you through the checklist:
- Perform an end-of-day report in the legacy system — cleanly close out the old system
- Archive the final DSFinV-K export — retain it (accounting records: eight years, § 147 (3) AO)
- Keep the old hardware TSE and report its decommissioning
- Report the new POS to the tax office within 1 month (§ 146a AO) — Step 3 takes care of this
- Update your procedural documentation — record the POS switch in writing
Don't Simply Switch Off the Old System
Data from the old POS system remains subject to the retention obligation. Secure the final export and keep the old TSE first — only then switch it off.
Step 8: Done¶
Your POS is ready to go. If you switched systems, the switch checklist stays accessible from the dashboard until it's complete, so nothing gets left behind.
Two Real-World Examples¶
Example: New Business — Ristorante Bella Vista
Giulia is opening Bella Vista and has never operated a POS before. On first login, the wizard starts: she enters her tax data, uploads her ELSTER certificate — the POS is registered with the tax office. At "Woher kommen deine Daten?" ("Where does your data come from?"), she chooses Fresh start, no legacy system and photographs her printed menu — the AI creates the articles. She never even sees the export guide or the switch checklist. She's done after four steps.
Example: Switching — Curry Corner Moves from ready2order
Curry Corner has been using ready2order for years. In the wizard, the owner selects ready2order as the data source — the direct import takes over his articles. He also gets the export guide for ready2order and, at the end, the legal switch checklist: end-of-day report in the old system, archive the final export, keep the old TSE. This way, the switch is cleanly documented for the tax office as well.
Outside Germany
The tax office steps (tax data with state, ELSTER, cash register notification under § 146a AO) apply only to Germany. If you operate your POS in another country, simply skip these steps — the rest (data source, menu) apply everywhere.
Next Steps¶
- Basic Setup — set up printers, TSE, payment methods, and modules
- Creating Articles — manage your menu in detail
- Kassenmeldung — Cash Register Notification to the Tax Authority — everything about the notification under § 146a AO
- Data Import — imports from legacy systems in detail